摘要
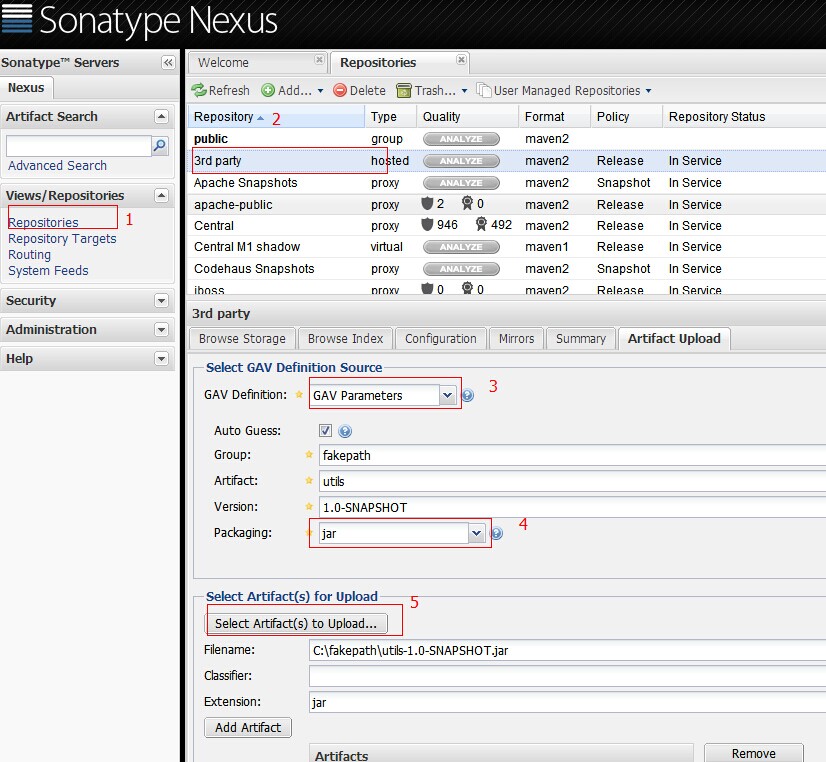
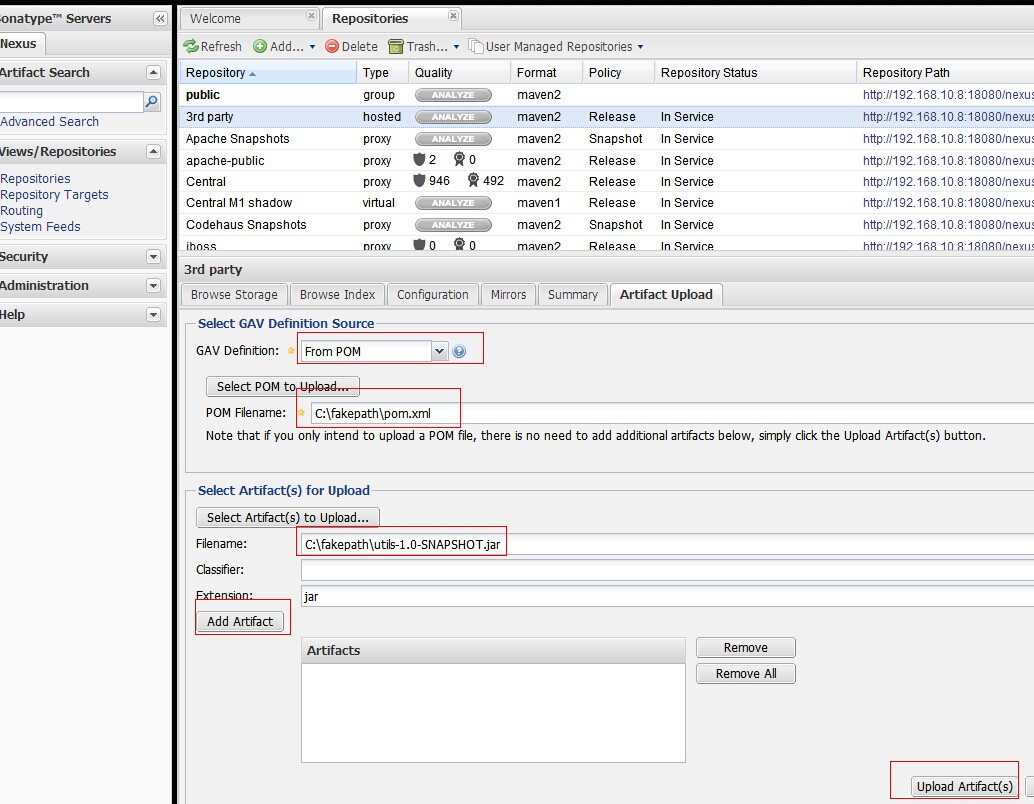
1通过网页上传

这种方法只是上传了jar包。通过maven引用当前jar,不能取得jar的依赖

from pom的方式,选择pom文件,以及jar。通过maven引入jar时,会自动加载jar的依赖
2通过maven的方式depoly
在maven的conf/setting.xml 配置nexus私服的管理账号
在servers标签下添加server
<server> <id>nexus-snapshots</id> <username>repouser</username> <password>repopwd</password> </server>
id可自己定义一个名称 以及私服的管理管的账号密码
在mirrors和profiles下配置nexus私服
<mirrors> <mirror> <!--This sends everything else to /public --> <id>nexus</id> <mirrorOf>*</mirrorOf> <url>http://192.168.10.8:18080/nexus/content/repositories/releases/</url> </mirror></mirrors><profiles> <profile> <id>nexus</id> <!--Enable snapshots for the built in central repo to direct --> <!--all requests to nexus via the mirror --> <repositories> <repository> <id>nexus</id> <name>local private nexus</name> <url>http://192.168.10.8:18080/nexus/content/groups/public</url> <releases><enabled>true</enabled><updatePolicy>always</updatePolicy> <checksumPolicy>warn</checksumPolicy></releases> <snapshots><enabled>false</enabled></snapshots> </repository> </repositories> <pluginRepositories> <pluginRepository> <id>nexus</id> <name>local private nexus</name> <url>http://192.168.10.8:18080/nexus/content/groups/public</url> <releases><enabled>true</enabled><updatePolicy>always</updatePolicy> <checksumPolicy>warn</checksumPolicy></releases> <snapshots><enabled>false</enabled></snapshots> </pluginRepository> </pluginRepositories> </profile></profiles><activeProfiles> <!--make the profile active all the time --> <activeProfile>nexus</activeProfile></activeProfiles>
在项目的pom.xml中配置
<distributionManagement> <repository> <id>nexus-releases</id> <name>Nexus Release Repository</name> <url>http://192.168.10.8:18080/nexus/content/repositories/releases/</url> </repository> <snapshotRepository> <id>nexus-snapshots</id> <name>Nexus Snapshot Repository</name> <url>http://192.168.10.8:18080/nexus/content/repositories/snapshots/</url> </snapshotRepository>
</distributionManagement>
id与settings.xml中的server的id对应
当项目package后
mvn deploy
就可以将jar上传到nexus私服